
Quick Answer
Transforming a garage into a creative studio begins with thoughtful garage workshop ideas that prioritize function and inspiration. An effective garage workshop setup starts by clearing clutter, assessing space, and planning zones for specific tasks. The best workbench provides sturdy, adjustable surfaces suited to detailed work, while durable garage workshop flooring, often epoxy-based, offers seamless resistance to spills and heavy use. Smart workshop design integrates lighting, storage, and ventilation for sustained productivity.
Introduction
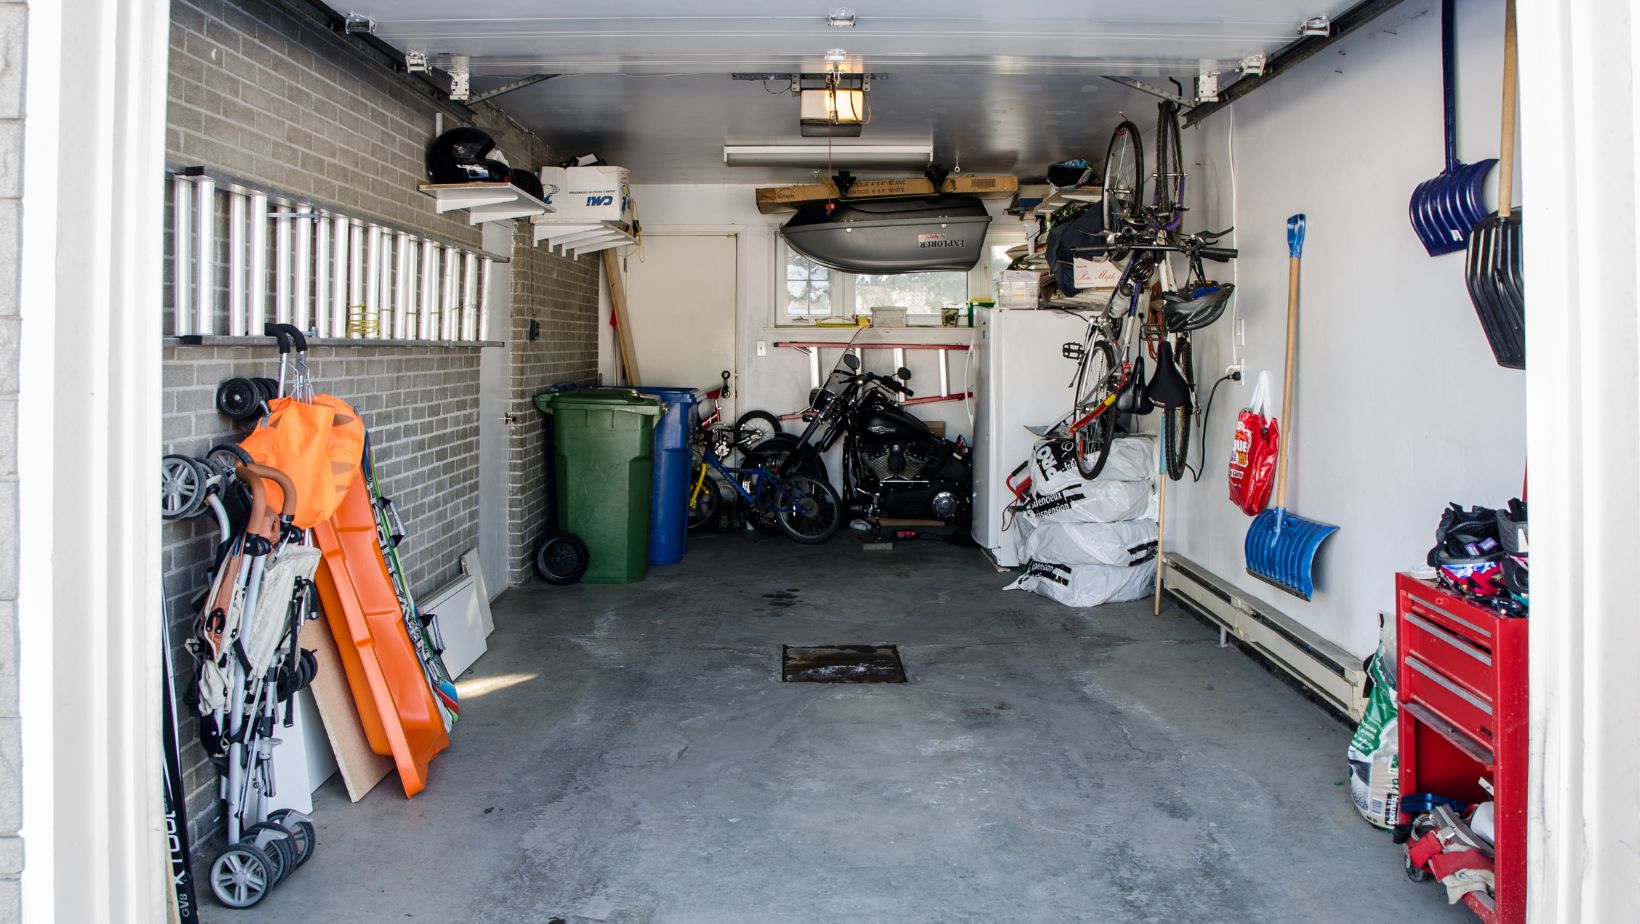
Many professionals and serious hobbyists face the same frustration when an underused garage collects dust and clutter instead of supporting meaningful creative output. The space sits idle despite its potential to become a dedicated area for art, crafting, woodworking, or design projects, limited only by inadequate preparation and layout choices.
Working with expert epoxy installers often yields results that hold up under heavy creative demands far longer than basic DIY attempts. From there, the focus shifts to selecting components that align with individual workflows, ensuring the space feels efficient rather than restrictive.
Planning Your Garage Workshop Setup
The foundation of any successful conversion lies in assessing the existing space and establishing clear functional zones before investing in equipment or finishes. Begin by measuring the garage dimensions precisely, accounting for door swing, vehicle parking if shared, and natural light patterns throughout the day. Identify potential issues such as uneven concrete, high humidity from seasonal changes, or insufficient electrical circuits that could limit tool usage and safety.
Assessing Space and Creating Zones
Divide the area into dedicated zones based on workflow. Place high-mess activities like painting or sanding near ventilation sources, position detailed assembly or design work closer to natural light, and reserve storage for materials along walls to maintain open floor space. This zoning approach reduces cross-contamination and improves movement efficiency during long sessions.
Essential Preparation Steps
A structured preparation sequence sets the stage for lasting performance.
- Clear all items from the garage and sweep thoroughly to reveal the slab condition.
- Test for moisture vapour emission using calcium chloride kits or plastic sheet methods to confirm the concrete remains suitable for coatings.
- Repair cracks wider than 3 mm with appropriate filler and grind high spots for levelness.
- Upgrade electrical service if needed, adding dedicated 20-amp circuits and GFCI outlets for power tools.
- Install adequate overhead lighting, aiming for at least 500 lux across work surfaces.
Prioritize ventilation upgrades early, such as exhaust fans rated for volatile organic compounds, because poor air quality quickly becomes the limiting factor in creative endurance.
The result is a layout that supports focused work without constant rearrangement. Proper planning minimizes wasted effort and positions the space for the durable surfaces and sturdy fixtures that follow.
Selecting the Best Garage Workbench and Flooring
Once the layout takes shape, attention turns to core components that define daily usability and longevity in the creative environment. The best garage workbench combines stability, ample surface area, and thoughtful storage to support varied tasks without constant adjustments. At the same time, garage workshop flooring must handle drops, spills, and abrasion while maintaining a clean, safe underfoot surface that complements prolonged standing or movement.
Choosing the Right Workbench Configuration
Workbenches fall into stationary, mobile, and foldable categories, each suiting different creative demands. Stationary models with heavy steel frames and solid wood or composite tops offer maximum rigidity for precision work like detailed assembly or carving.
Mobile versions on lockable casters provide flexibility to reposition as projects evolve, ideal when the space occasionally serves dual purposes. Foldable designs save floor area but sacrifice some load capacity, making them better for occasional use.
Key factors include weight rating, typically 500 kg or higher for serious creative loads, adjustable height options for ergonomic comfort during extended sessions, and integrated drawers or pegboard for tool access. Solid wood tops absorb vibration well for hand tools, whereas stainless steel or laminate surfaces resist stains from paints and adhesives.
Comparing Garage Workshop Flooring Options
Garage workshop flooring choices impact everything from slip resistance to cleanup speed. A comparison of common materials highlights trade-offs in performance and installation.
| Material | Durability (Impact/Chemical Resistance) | Installation Time | Moisture Tolerance | Maintenance Level | Typical Cost (per m²) |
| Epoxy Coating | High | 2–4 days | Moderate (requires dry slab) | Low | $15–$35 |
| Polyaspartic Coating | Very High | 1 day | High | Very Low | $25–$50 |
| Interlocking Tiles | Medium to High | Hours | High | Medium | $10–$30 |
| Polished Concrete | Medium | 1–2 days | Moderate | Low | $8–$20 |
Epoxy systems deliver a seamless, glossy finish that seals the concrete against oils and solvents common in creative pursuits. Professional installation involves thorough preparation to prevent delamination from vapour or poor adhesion.
The result is a cohesive foundation where the workbench and floor work together to reduce fatigue and protect equipment. These selections create an environment that invites longer, more productive creative time without interruptions from equipment failure or difficult cleanup.
Optimizing Garage Workshop Design for Creativity and Function
With solid groundwork and essential fixtures in place, the final refinements focus on elements that elevate both practical performance and creative flow. Thoughtful garage workshop design integrates lighting, climate control, storage systems, and acoustic considerations to create an environment where ideas can develop without unnecessary friction or distraction.
The goal remains sustained productivity rather than short bursts of activity interrupted by discomfort or inefficiency.
Lighting and Ventilation Strategies
Natural light supports colour accuracy and reduces eye strain during detailed tasks, yet most garages rely heavily on artificial sources. Combine daylight from windows or skylights with layered LED lighting: overhead fixtures delivering 500 to 750 lux for general illumination, adjustable task lights for bench work, and cooler colour temperatures (4000K to 5000K) that mimic daylight without harsh glare.
Ventilation becomes equally critical when solvents, dust, or fumes arise from adhesives, paints, or sanding. Install exhaust fans with at least 200 cubic metres per hour capacity, positioned to pull air from floor level where heavier vapours settle, paired with intake vents on the opposite wall to maintain positive pressure and consistent airflow.
Storage and Organization Systems
Efficient storage prevents clutter from encroaching on work zones and keeps tools accessible without breaking concentration.
- Wall-mounted pegboards and slatwall panels hold frequently used hand tools within arm’s reach.
- Overhead racks store seasonal materials or bulky items like lumber, freeing floor space.
- Modular drawer cabinets beneath the workbench organize small parts by size and type.
- Mobile carts allow supplies to move between zones as needed.
- Clear labelling and shadow boards for tools reduce search time and improve safety.
Maintaining Long-Term Performance
Regular inspection prevents small issues from becoming major disruptions. Check coating integrity quarterly for chips or peeling, particularly in high-traffic areas, and reapply touch-up as needed to preserve the seal.
Clean surfaces with pH-neutral solutions rather than harsh degreasers that can degrade finishes over time. Monitor humidity levels with a basic hygrometer, aiming to stay below 60 percent to avoid condensation that could affect wood stock or electronics. These habits extend the lifespan of investments and keep the space reliable year-round.
Conclusion: Building a Lasting Creative Space in Your Garage
A successful garage conversion rewards careful planning with a workspace that supports serious creative work for years. From initial zoning and preparation through selection of a robust workbench and resilient flooring to thoughtful refinements in lighting, ventilation, and storage, each decision contributes to reduced friction and increased productivity.
Regular maintenance preserves performance while modular elements allow the space to evolve with changing projects and tools. The payoff appears in longer, more focused sessions free from interruptions caused by poor air quality, cluttered surfaces, or equipment failures.
When executed with attention to building science and practical realities, these garage workshop ideas create an environment that consistently delivers value for dedicated makers and professionals alike.