Cedar Gazebo Kits
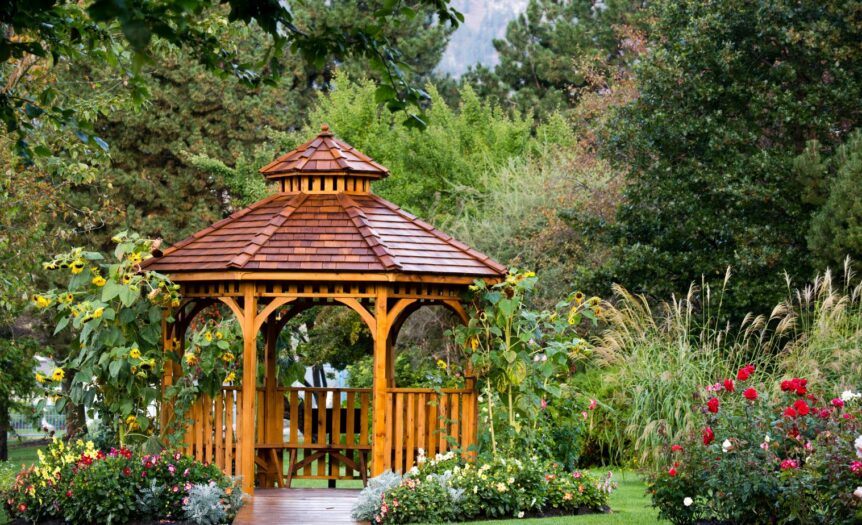
When it comes to creating a beautiful outdoor space, cedar gazebo kits are an excellent option to consider. As an experienced blogger, I have seen firsthand the appeal and versatility of these kits. With their natural beauty and durability, cedar gazebo kits offer a stunning addition to any backyard or garden. In this article, I’ll delve into the benefits of choosing a cedar gazebo kit, from its aesthetic appeal to its long-lasting quality.
One of the key advantages of cedar gazebo kits is their timeless beauty. Cedar wood has a unique grain pattern and rich color that adds a touch of elegance to any outdoor setting. Whether you prefer a rustic or modern look, a cedar gazebo kit can easily be customized to match your style and preferences. The natural beauty of cedar also ages gracefully, developing a charming silver-grey patina over time, further enhancing its appeal.
Aside from their aesthetic appeal, cedar gazebo kits are renowned for their durability. Cedar wood is naturally resistant to rot, decay, and insect damage, making it an ideal choice for outdoor structures. This means that your gazebo will be able to withstand the elements and retain its structural integrity for years to come. With proper maintenance, a cedar gazebo kit can provide you with a beautiful and functional outdoor space that will stand the test of time.
Steps to Assemble a Cedar Gazebo Kit
Preparing the Ground
Before assembling a cedar gazebo kit, it’s important to properly prepare the ground to ensure a stable and level foundation. Follow these steps:
- Measure and mark the area where the gazebo will be installed. Ensure the space is suitable for the size of the kit and that it offers enough clearance from any surrounding structures or trees.
- Clear the area of any debris, rocks, or plants. Level the ground using a shovel or rake, removing any high spots and filling in any low areas.
- Lay a landscape fabric over the prepared ground. This will help prevent weed growth and promote drainage.

Building the Foundation
A solid foundation is crucial for the stability and longevity of your cedar gazebo. Consider these steps when building the foundation:
- Determine the type of foundation based on your specific needs and local building codes. Common options include a concrete slab, deck, or paver base.
- Prepare the foundation according to the chosen method. This may involve pouring concrete, building a wooden deck, or installing a paver base.
- Allow sufficient time for the foundation to cure or settle before proceeding with the assembly of the gazebo kit.
Assembling the Gazebo Frame
Now that the ground is prepared and the foundation is in place, it’s time to assemble the cedar gazebo frame. Follow these steps:
- Organize the parts of the gazebo kit according to the manufacturer’s instructions. Lay them out in an easily accessible area.
- Start with the base of the gazebo, following the instructions provided. Use the included hardware and tools as needed to securely connect the base components.
- Work your way up from the base, attaching each subsequent section of the gazebo frame according to the manufacturer’s instructions. Ensure that each connection is tight and secure before moving on to the next step.
- Check for plumb and level at regular intervals during the assembly process. This will ensure that the gazebo is straight and properly aligned.
- Tighten all fastenings once the entire frame is assembled. This will provide added stability and strength to the structure.
Installing the Roof and Flooring
The final steps involve installing the roof and flooring, giving your cedar gazebo a finished look. Follow these steps:
- Attach the roof components according to the manufacturer’s instructions. This may involve installing rafters, roof panels, and any additional decorative elements.
- Ensure that the roof is securely attached to the gazebo frame, using the specified hardware and fastenings.
- Finish the roof by applying any recommended sealants or protective coatings to enhance its durability and weather resistance.
Ongoing Article
Cedar gazebo kits provide a beautiful and durable outdoor space, and assembling them is a rewarding process. By following these steps, you can ensure a successful assembly and enjoy your cedar gazebo for years to come. Remember to carefully choose the location and prepare the ground to provide a stable foundation. Assembling the frame requires organization and attention to detail, while the installation of the roof and flooring completes the gazebo’s functionality. With careful planning and proper execution, your cedar gazebo kit will become a stunning addition to your backyard.