
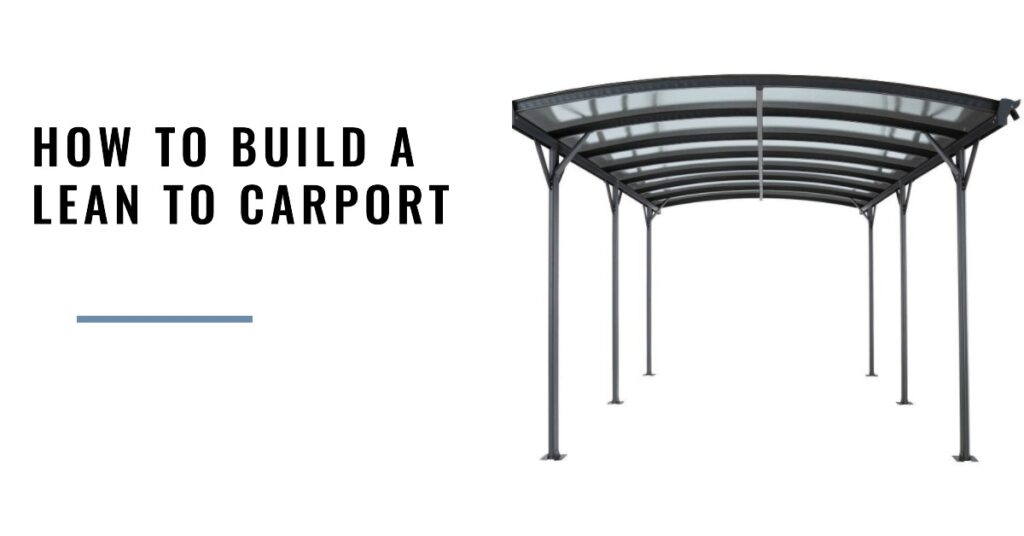
Are you looking to add a functional and affordable addition to your home? Building a lean-to carport could be the perfect solution. These versatile structures offer ample protection for your vehicle while also enhancing the aesthetics of your property.
In this blog post, we’ll provide you with clear, straightforward guidance on how to build a lean-to carport from start to finish – no jargon or fluff here! We’ll cover everything from choosing the right location, securing permissions, and gathering materials through optional upgrades and maintenance tips.
Key Takeaways
- Choosing the right location and measuring the area accurately is crucial when building a lean-to carport. Make sure to obtain necessary permits from your local authorities before starting the project.
- Gathering all the necessary tools and materials, such as circular saws, post hole diggers, and safety equipment, is essential for building a sturdy foundation and support beams in your carport.
- Adding optional upgrades like gutters or lighting fixtures can enhance convenience and improve functionality while maximizing space by incorporating storage or shelving systems. Ensure regular maintenance practices are followed to extend the lifespan of your newly built structure.
- Protecting your lean-to carport from environmental factors such as rain, wind, snow or harsh sunlight with durable roofing materials like metal sheets will provide reliable shelter for vehicles giving peace-of-mind during hard times providing a valuable addition to properties!
Planning And Preparing For Your Lean-To Carport Project
Before starting your lean-to carport project, it’s crucial to choose the right location and measure the area carefully, obtain necessary permits and permissions, and gather all the necessary tools and materials.
Choosing The Right Location And Measuring The Area
Selecting the ideal location for your lean-to carport is a crucial first step in the process. Consider factors such as the proximity to your home or other structures, ease of access, and exposure to prevailing winds, sun, and rain.
Once you’ve chosen the perfect spot for your carport, take accurate measurements of the area where it will be built. It’s essential to leave enough space not only for your vehicle but also for maneuverability around it as well as any storage or shelving you may want to include.
A popular size for a single-car shelter is 12×24 feet; however, adjust these dimensions based on your specific needs and desired layout. Don’t forget to account for extra room needed during installation – especially when securing support posts and pouring concrete footings.
Obtaining Necessary Permits And Permissions
Before starting on your lean-to carport project, it is crucial to obtain the necessary permits and permissions from local authorities. Building codes vary by location, and you do not want to risk facing legal consequences if your structure does not meet the requirements.
To obtain necessary permits, you will need to contact your local building department or city hall. They will advise if a permit is needed for your project and provide instructions on how to apply.
Additionally, it’s essential to check with any homeowners’ associations in your area as some have specific regulations regarding lean-to carports’ size, design, and placement.
Gathering The Necessary Tools And Materials
Before you start building your lean-to carport, it’s essential to gather all the necessary tools and materials. You’ll need a variety of basic and specialized tools such as a circular saw, drill, measuring tape, level, post hole digger, shovel or spade, hammer or mallet, and safety equipment like gloves and eye protection.
It’s important to note that different types of carports may require additional specific tools or materials. For example; wooden carports may need extra sandpaper and wood sealer or paint while metal ones may require brackets specifically designed for anchoring the structure onto pavement or concrete surfaces.
Building Your Lean-To Carport: Step-by-Step Instructions
Get started on building your lean-to carport by first constructing the foundation and securely attaching support posts, followed by adding the roof frame and rafters, then finishing off with roofing and siding installation.
Building The Foundation And Securing The Posts
The foundation and posts are essential components of any lean-to carport. First, mark the area where you want to build your carport, then use a post hole digger to create holes for each support beam.
Pour a bagged concrete mix into the hole and add gravel for drainage before placing metal anchors in each hole.
Next, install support beams by attaching them to your home or securing them into place using lumber boards nailed together horizontally on top of each post. Ensure that all corners are flush and plumb before nailing or screwing joints together.
By following these steps carefully, you’ll have sturdy foundation and posts that will provide reliable support for your new lean-to carport.
Installing The Roof Frame And Rafters
To install the roof frame and rafters for your lean-to carport, you’ll need to refer to your DIY plans or follow the manufacturer’s instructions if using a kit. Typically, this involves securing support headers between posts, attaching metal brackets or fasteners to connect them securely.
Next, position metal roofing panels over the top of the structure and screw them down into place with self-tapping screws. Depending on your climate zone, adding roofing underlayment (a layer of waterproof paper) may be recommended before installing the panels.
When building a lean-to carport attached to your house, make sure flashing is installed properly between any connecting walls and roofs so that no moisture can seep in through gaps over time.
Adding Roofing And Siding
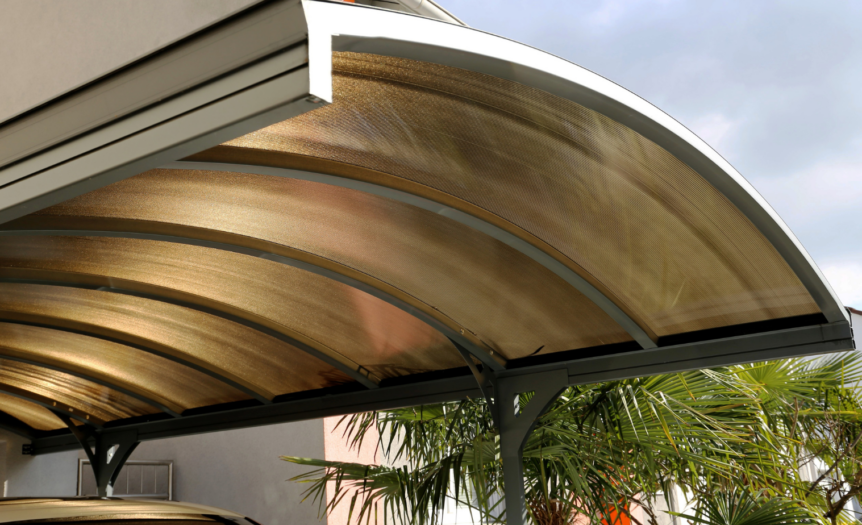
Once the lean-to carport frame is in place, it’s time to add roofing and siding. For the roofing material, you can choose from a variety of options such as metal sheets, shingles, or polycarbonate panels.
Metal sheets are affordable and widely available while shingles provide a more traditional look.
As for the siding material, popular choices include plywood or oriented strand board (OSB) covered with vinyl or aluminum.
It’s important to measure and cut each piece accurately before attaching it securely to the framework.
Optional Upgrades And Features To Consider
Consider adding gutters and downspouts to your lean-to carport to divert rainwater away from the structure and prevent water damage.
Adding Gutters And Downspouts
Gutters and downspouts are crucial components that can be included in your lean-to carport project. They help to redirect rainwater away from your carport, preventing water damage to the structure and surrounding landscaping.
To install gutters and downspouts, begin by measuring and determining where they will attach on the roof of the carport. Next, use screws or adhesive tape to secure them onto the roof frame.
Ensure that you place enough spacing between each gutter section, generally 10 feet apart or less if needed depending upon how much moisture is expected in your area.
Gutter materials come in a variety of options such as aluminum, copper, steel or vinyl with different colors available too!
Downspouts typically come in sizes ranging from 2-inches to 3-inches wide and lengths around ten feet or more depending upon capacity needs with various shapes like round or square confirmed based on aesthetic preference- all which can be purchased easily online at stores like Home Depot or Lowe’s using their custom measurement tools to get a perfect fit!
With proper installation and maintenance these components ensure longevity for many years of reliable performance while adding an extra layer of protection from natural disasters for both your vehicle as well as personal property nearby giving peace-of-mind during hard times!
Installing Lighting Or Electrical Outlets
Adding lighting and electrical outlets to your lean-to carport can greatly enhance its functionality and convenience. You will need to hire a licensed electrician to ensure the proper installation of wiring, switches, and fixtures.
For lighting, consider installing motion-activated LED lights for energy efficiency and security purposes. Electrical outlets are useful for charging electronics or using power tools and should be placed strategically throughout the space.
According to important facts on building a lean-to carport, maintaining your newly built structure goes beyond cleaning it regularly.
You also have to protect it from weather elements such as windstorms that can cause severe damage if not well anchored in place with sturdy posts. These should be secured by metal anchors fixed into concrete poured foundation, which are strong enough hold up against heavy downpours of rainwater.
Adding Storage Or Shelving
Adding storage or shelving to your lean-to carport is a great way to maximize space and keep your things organized. There are various ways you can go about this, depending on the size of your carport and how much storage you need.
One option is to install cabinets with shelves above them along one or both walls of the carport.
Another option is to attach a set of brackets onto one wall that will support sturdy wire baskets or an adjustable shelf system. These are perfect for holding small items such as gardening tools, gloves, and seed packets while leaving plenty of room for larger items like bicycles, or lawn mowers on the floor below.
Maintenance And Care For Your Lean-To Carport
Regular cleaning and inspection, repairing any damage or wear and tear, and protecting your carport from weather and environmental factors are essential for maintaining the longevity of your lean-to carport.
Regular Cleaning And Inspection
Ensuring that your lean-to carport is well-maintained is crucial to its longevity and overall functionality. Regular cleaning and inspection of your carport will help prevent any damage caused by environmental factors or wear and tear over time.
Dust and debris should be cleared off the roof, gutters, and downspouts regularly to keep them free-flowing.
Inspecting your lean-to carport for damages such as cracks in the foundation, rusted metal parts or broken lumber support posts should also be done periodically. If you notice these issues early on, they can be addressed promptly before causing more significant problems for your structure’s integrity.
By practicing regular care practices like cleaning and inspecting your lean-to carport, you’ll safeguard it from potential damage immensely while extending its lifespan exponentially.
Repairing Any Damage Or Wear And Tear
Over time, your lean-to carport may become damaged or show signs of wear and tear. It’s important to regularly assess the structure and make repairs as needed to maintain its integrity.
To repair any damage or wear and tear on your lean-to carport, start by identifying the source of the problem. For example, if there is a leak in the roof, inspect it for holes or gaps in the roofing material that need patching.
You should also check regularly for signs of rust on metal parts and replace them as necessary.
By addressing any structural issues early on and conducting ongoing maintenance activities such as cleaning gutters and keeping drainage clear around your carport, you can extend its lifespan significantly while ensuring continued protection for your vehicle against the elements!
Protecting Your Carport From Weather And Environmental Factors
Keeping your lean-to carport safe from the elements is crucial to extending its lifespan and ensuring that it provides adequate protection for your vehicles. Regular cleaning and inspection can help identify any damage or wear and tear caused by weather factors such as rain, snow, or wind.
In addition to regular maintenance, you may want to consider investing in protective measures such as adding gutters and downspouts to direct rainwater away from the structure.
Installing lighting or electrical outlets in your carport can also enhance its usability during inclement weather conditions. Finally, using durable materials such as metal roofing and pressure-treated lumber can help protect against environmental factors like rotting or rusting over time.
Conclusion: Enjoying Your Newly Built Lean-To Carport And Staying Safe And Secure
By following the step-by-step instructions outlined above, you’ve ensured that the project was planned, prepared and executed correctly with all necessary permits obtained.
Remember to add those optional upgrades such as gutters or lighting features for added convenience and functionality.
Now sit back and relax knowing that your car is protected from harsh weather conditions while staying safe and secure in your newly built lean-to carport!
FAQs:
1. Is it difficult to build a lean to carport on my own?
Building a lean to carport can be challenging for someone without experience in construction. However, with the right tools, materials and instruction, anyone can take on this project.
2. What size should my lean to carport be?
The size of your lean-to carport will depend on what you plan to use it for and how many vehicles you want to shelter under it. A common size is 12 feet wide by 20-24 feet long, but you should measure carefully before deciding on dimensions.
3. How do I prepare the site before building my lean-to carport?
Before starting any construction project, ensure that the area where you plan to build is level and well-drained. Remove any debris or obstacles that may interfere with the installation of posts or beams.