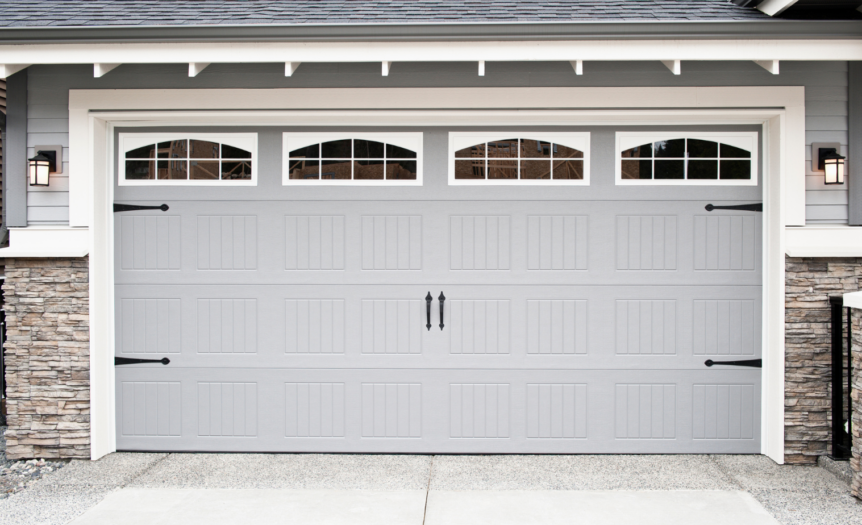
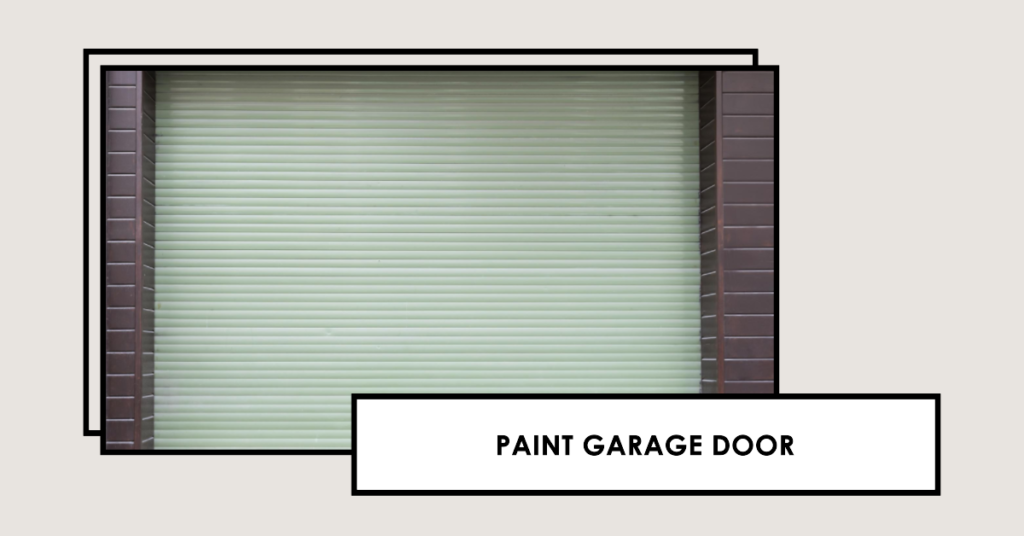
A fresh coat of paint can work wonders in transforming your garage door, instantly boosting its appearance and giving your home’s exterior a revitalized look. While it may seem intimidating at first, painting your garage door is actually a simple DIY project that you can tackle with ease if you know the right steps to follow.
I will now take you through some essential tips on surface preparation, paint selection, painting techniques, and aftercare to help you achieve professional results without breaking the bank.
Key Takeaways
- Before painting your garage door, clean the surface thoroughly and address any necessary repairs to create a smooth base for the paint job.
- When choosing paint, consider using an exterior-grade latex with UV protection that complements your home’s exterior. Spray painting can be a quicker and more efficient alternative to traditional methods but requires careful preparation and safety precautions.
- To achieve professional results when painting your garage door, use long strokes in one direction and start at the top, working downwards. Use painter’s tape to create clean lines and add hardware or accents once the paint has cured fully. Regular cleaning, touch-ups, and applying a protective coating are essential for aftercare maintenance.
Preparing Your Garage Door For Painting
Before painting your garage door, it’s crucial to clean the surface thoroughly by removing any dirt or debris using a garden sprayer or hose.
Cleaning The Surface
A clean surface is essential to achieving a professional finish on your garage door. Start by removing dirt, dust, grease, and any existing paint chips from the surface of the door.
You can use a garden sprayer or hose to rinse off loose debris before you get down to business with more rigorous cleaning methods.
After washing, ensure that every trace of soap is rinsed away thoroughly, as leftover residue can adversely affect paint adhesion later on. For tricky spots such as stubborn stains or areas covered in mold and mildew, consider using a specialized cleaning solution designed specifically for exterior surfaces.
Keep in mind that some cleaners may require extra rinsing so be sure to follow product instructions carefully during this vital step in painting your garage door.
Sanding And Priming
Preparing your garage door for painting is a crucial step if you want to achieve a smooth and long-lasting finish. One of the most important steps in this process is sanding and priming.
Sanding helps to create a smooth surface free of imperfections, making it easier for the primer and paint to adhere properly.
After completing the sanding process, apply a thin layer of primer onto the garage door’s surface with a brush or roller. Primer serves as an adhesive coat that helps paint stick better while also preventing rust from forming on metal surfaces.
It’s essential not to skip this step since it can cause peeling and chipping over time, leading to costly repainting jobs down the road.
Filling In Cracks And Holes
Before painting your garage door, it’s important to fill in any cracks or holes on the surface. Small dents and scratches can be easily filled with spackle or wood putty using a putty knife.
For larger gaps or holes, use an epoxy filler to create a smooth surface for the paint to adhere to. Once you’ve applied the filler, allow it to dry completely before sanding down any rough spots with 180-grit sandpaper.
In addition, addressing any necessary repairs before beginning the painting process will ensure that your results look professional and long-lasting. By creating a level base for your paint job instead of trying to cover up damage after applying several coats of paint, you’ll also prevent costly future repairs due to hidden structural damage caused by moisture exposure from unprotected areas underneath peeling or flaking surfaces.
Removing Hardware
Before painting your garage door, removing any hardware is necessary to ensure proper coverage and a clean finish. This includes handles, locks, hinges, and any other parts that protrude from the surface of the door.
To remove these items, use a screwdriver to unfasten screws and bolts carefully. Then place all hardware in a safe place until you’re ready to reattach them after painting.
Remembering where each piece goes can save you time when it’s time for reassembling.
Following this step-by-step guide will help you achieve satisfying results for your DIY garage door painting project while avoiding costly mistakes down the road as well ensuring everything is done smoothly with little hindrance along the way!
Choosing The Right Paint And Equipment
When it comes to selecting the right paint and equipment for your garage door, there are a few key things to consider – from the type of paint to the brushes and rollers you’ll need.
Selecting The Type Of Paint
Choosing the right type of paint for your garage door is crucial. Flat paints are great for hiding surface imperfections and preventing reflections, which can otherwise be quite distractive.
Glossy finishes, on the other hand, can give a more polished look but show dents and scratches more easily. Consider using an exterior-grade latex paint with UV protection to ensure that it holds up well under varying weather conditions.
The color you choose should also complement your home’s exterior and its surroundings.
Choosing The Right Brushes And Rollers
To ensure a smooth and even coat of paint on your garage door, it’s important to choose the right brushes and rollers for the job. For larger areas, use a 4-inch or 6-inch roller with half-inch nap to apply paint quickly and efficiently.
In addition, be sure to clean your brushes and rollers thoroughly after each use to extend their longevity. Simply wash them with warm soapy water, rinse thoroughly, then allow them to air dry before storing.
Consider Spray Paint As An Alternative
If you’re looking for a quicker and more efficient way to paint your garage door, spray paint can be a great alternative to traditional brushing or rolling techniques. Spray painting allows you to evenly distribute the paint across the entire surface area in one even coat, eliminating the need for multiple touch-ups.
Additionally, it’s easy to use and provides a smooth finish. However, it’s important to note that spray painting requires careful preparation and safety precautions since overspray can damage surrounding surfaces if not adequately protected.
When selecting spray paint for your garage door, choose an oil-based product designed specifically for exterior surfaces like metal or wood. These types of paints are durable enough to withstand harsh weather conditions and protect against rust or corrosion.
Tips For Painting Your Garage Door
To ensure a professional-looking finish, start painting your garage door at the top and work downwards.
Starting At The Top And Working Down
When painting your garage door, it’s essential to start at the top and work your way down. This ensures that any drips or splatters won’t ruin the paint job on areas you’ve already painted.
You should also make sure to paint each section of the garage door evenly, using long strokes in one direction.
Another helpful tip is to use an edge brush when painting panels or raised sections of the door. Use this tool to carefully cut in around any hardware or accents on the garage door for a more polished look.
Avoiding Drips And Splatters
One of the biggest challenges when painting a garage door is avoiding drips and splatters. These not only ruin the look of your paint job but can also damage surrounding areas.
Fortunately, there are some easy tips you can follow to avoid these issues. First, make sure to use enough paint on your brush or roller, but not too much that it drips off.
Secondly, start at the top of the door and work your way down slowly as this will allow excess paint to settle before reaching previously painted areas.
Applying multiple coats is essential for achieving complete coverage without any patches left behind; however, it shouldn’t be done in haste because doing so risks leaving marks everywhere which leads to drips and splatters appearing sooner rather than later.
Applying Multiple Coats
Once you’ve finished applying the first coat of paint, it’s important to apply multiple coats to achieve a smooth and even finish. You should wait until the first coat has dried before applying another layer.
Remember to take care not to overload your brush or roller with too much paint as this can cause drips and splatters that will mar your final result.
By following these tips for multiple coat application, you’ll be sure to get great results from painting your garage door.
Creating Clean Lines With Painter’s Tape
One of the keys to achieving a professional-looking garage door is creating clean lines with painter’s tape. Before applying any paint, use blue painter’s tape to mask off any areas that you don’t want painted, such as windows or decorative hardware.
Make sure that the surface is clean and dry before applying the tape.
When it comes time to remove the tape, do so carefully and slowly while the paint is still wet or tacky. This will help prevent peeling or tearing of both the paint and tape.
If you do end up with some bleed-through under the edges of your taped-off areas, simply touch up those spots with a small brush once everything else has dried completely.
Adding Hardware Or Accents
Adding hardware or accents to your garage door is a great way to give it a unique touch and enhance its overall appearance. You can choose from various styles of handles, hinges, and decorative accessories that are specifically designed for garage doors.
Before you start adding hardware or accents to your garage door, make sure that the paint has completely dried and cured. This will ensure that the new additions adhere properly without damaging the existing paint job.
Additionally, when choosing hardware or accents, consider the color scheme of your home’s exterior to create a cohesive look.
Aftercare And Maintenance
Proper drying and curing time, regular cleaning and touch-ups, protecting your painted garage door from the elements, as well as troubleshooting common painting issues are all important aspects of aftercare and maintenance.
Proper Drying And Curing Time
Allow sufficient time for the paint to dry and cure before touching or closing the door. The drying time depends on many factors, such as humidity, temperature, and ventilation.
In general, it takes 24 hours for the first layer of paint to dry before you can apply a second coat.
Curing is another critical step in painting your garage door. Curing refers to allowing the painted surface to harden fully over time.
It’s essential to follow proper drying and curing guidelines from when painting your garage door because if not done correctly, all your hard work will go down the drain (pun intended!).
Regular Cleaning And Touch-ups
After painting your garage door, it’s important to maintain the quality of the finish through regular cleaning and touch-ups. Clean your garage door periodically, preferably every six months or so, with mild soap and water.
If you notice any scratches or chips on the surface, address them promptly by touching up the affected spots with a small brush and matching paint color.
In addition to routine cleaning and touch-ups, consider applying a protective coating over your painted garage doors to safeguard them from adverse elements like UV rays, rain, snow, and temperature fluctuations.
Protecting Your Painted Garage Door From The Elements
After painting your garage door, it’s important to protect the fresh coat of paint from the elements.
One option is to use an exterior-grade polyurethane sealer or varnish specifically meant for painted surfaces. Apply it thinly with a brush or sprayer over the dried paint surface for added protection against weather damage and UV rays.
Regular touch-ups may also be required every few years depending on weather conditions and wear-and-tear.
Troubleshooting Common Painting Issues
Even with the best preparation and techniques, painting your garage door can still present some unexpected issues. One common issue is getting drips or runs in the paint.
To avoid this problem, make sure to use thin coats of paint and wait for each layer to dry completely before applying another coat.
Another potential problem is peeling or chipping paint after the job is complete. This can happen if there was dirt or debris on the surface before painting or if the wrong type of paint was used.
Lastly, be aware of weather conditions when painting your garage door. Paint may not adhere properly in extreme temperatures or high humidity levels, which can lead to uneven finishes and slower drying times.
Conclusion
Painting your garage door is an effective and affordable way to spruce up your home’s exterior. It may seem daunting at first, but with proper preparation, tools, and techniques, it can be a fun DIY project.
Remember to clean the surface thoroughly, sand and prime before painting, choose the right paint and equipment, apply multiple coats for best results, and protect your newly painted garage door from the elements.
FAQs:
1. What type of paint should I use to paint my garage door?
You’ll want to use a high-quality exterior-grade paint that is designed for metal or wood, depending on the material your garage door is made of. Be sure to also choose a color that complements the overall look of your home.
2. Do I need to prepare my garage door before painting it?
Yes, proper preparation is key when painting a garage door. This includes cleaning the surface thoroughly, sanding down any rough spots or rusted areas and priming the surface with a quality primer made specifically for your chosen type of paint.
3. Should I hire a professional painter or can I do it myself?
The decision whether to hire a professional mostly depends on your level of experience and comfort working with tools and materials needed for this job. If you’re confident in your abilities, then you may be able to tackle this project on your own; otherwise, hiring an experienced contractor who specializes in painting garages could save time & money while providing better results than DIY efforts may produce.
4. How long will it take me to finish painting my garage door?
The amount of time required varies depending upon many factors including: size/materials used/complexity whereas average projects could take several hours up-to days depending on scope involved.i.e., larger doors (or those requiring greater detail) will certainly require more time investment so factors like budget/time constraints etc should all be considered before beginning work done by yourself vs hiring professionals; however scheduling out regular maintenance throughout year can help simplify things while minimizing chance issues arise later-on down road too quickly jeopardize aesthetic appeal siding itself!
Related Posts
How to get rid of flies in garage
How to cool a garage
How to get rid of mice in garage
How to lubricate a garage door
How to heat a garage
How to clean garage floor
How much to epoxy garage floor
Why do garage doors open by themselves